

mini ball-gap spark tesla coil SGTC
tiny stirling engine 01
12月 5, 2018Solarbotic simple1
3月 17, 2019
In the DIY process, if you have any questions that you don’t understand, please send an email to our email address(bluefox911@163.com), the title says SGTC, we will reply you in the first time after seeing it.
This is a mini spark gap tesla coil(SGTC),it is small but full funtion.The most important thing is that it can touch and don’t worry about the electric shock injury.The original intention that we design this decive,plz reference The following article
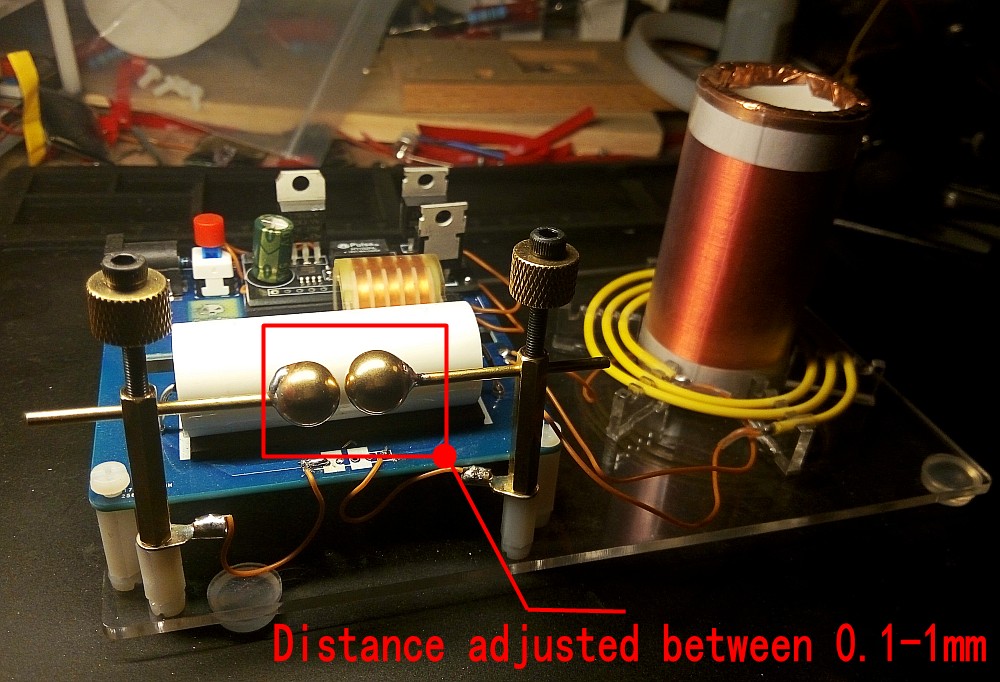
First briefly introduce this Tesla coil project:this is the third mini SGTC Project,It is basically the same as the previous three Project, except the part of the spark gap, we use the ball gap
The ball gap can be adjusted, the basic range is between 0.1-1mm, different gaps will lead to different discharge frequencies and charging voltage of the capacitor, so the discharge effect is different, you will feel the fun of trying………..
OK,let us start making it
Step1
Foam is buffered at the bottom

step2
The transformer coil needs to be installed according to the picture, and the rough copper wire is the primary position.
Please look at the annotation on the picture
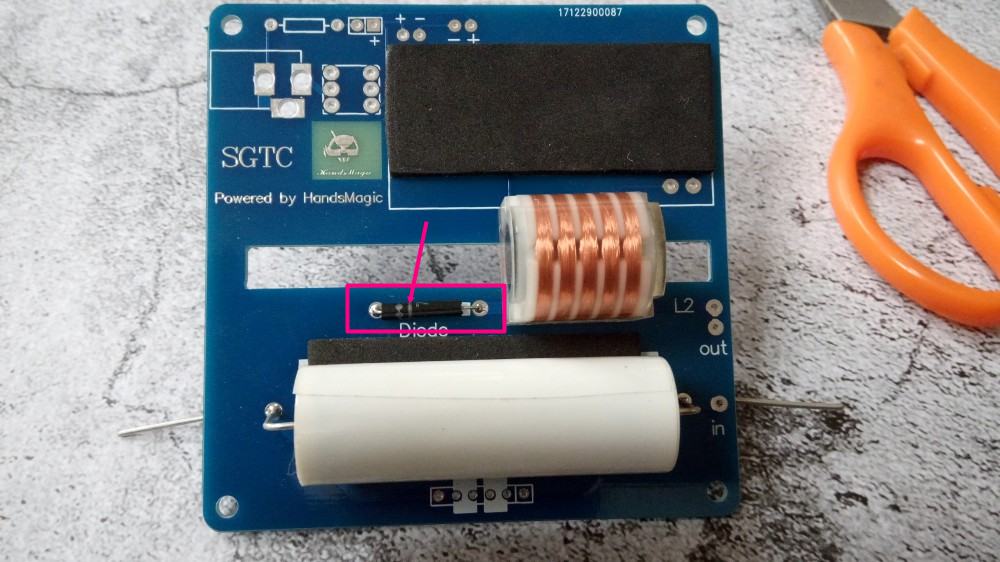
step3
High voltage diode
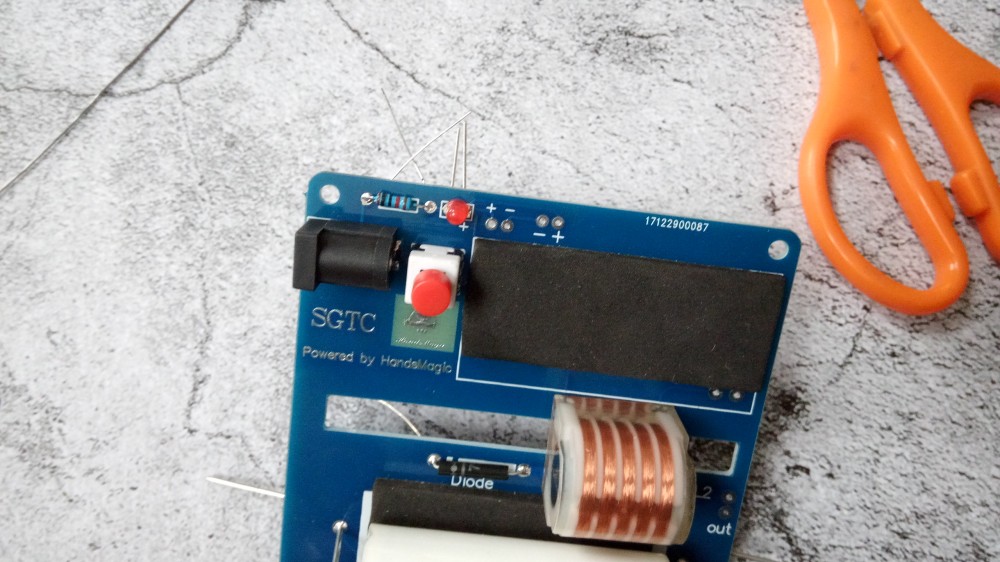
step4
Power indicator lamp,led long foot is +

step5
Power socket and switch
step8
High voltage signal generator(Third generation board)

solder wire

soldering to the right place marked in picture below,on the board you can see “+” and “-”

There are “+” and “-” on the board, and we must carefully weld, “+”to “+”


ok,the board finished
step9
now need connect the Primary coil and secondary coil to this board
first glue the bottom shell
In order to look good, we use UV curing glue, transparent
The perfectionist can be like us, but if you do not mind
Then just like you,Any glue is all right.
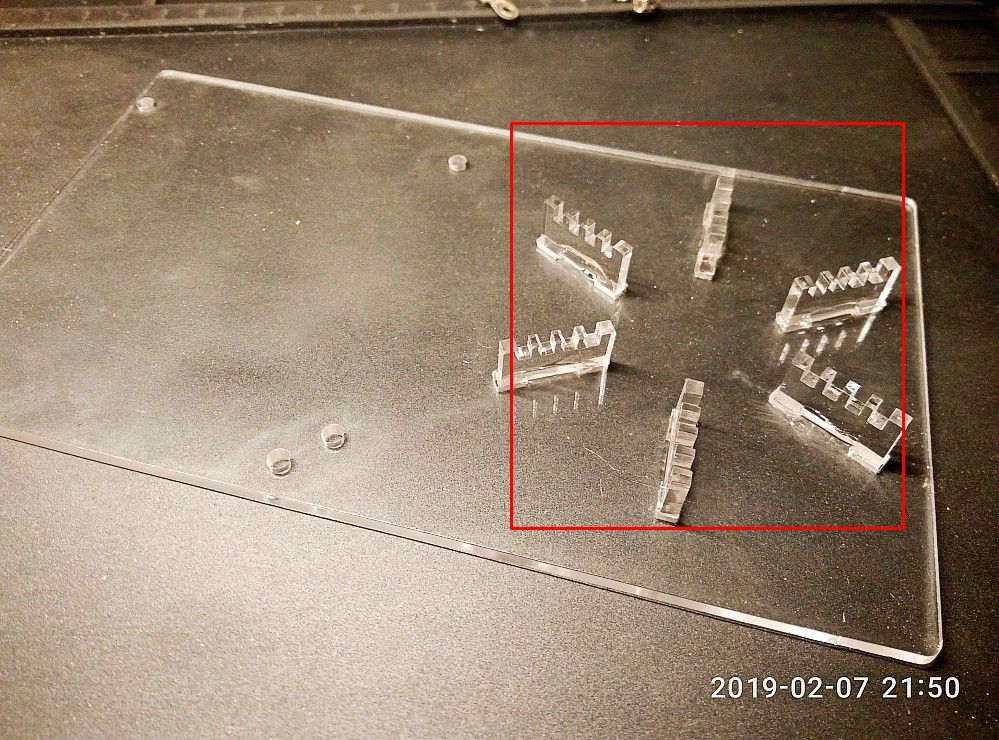
(Acrylic board back)3 silicone pads stuck in the corner
Another need to reserve space for the nut, so don’t stick to the corner
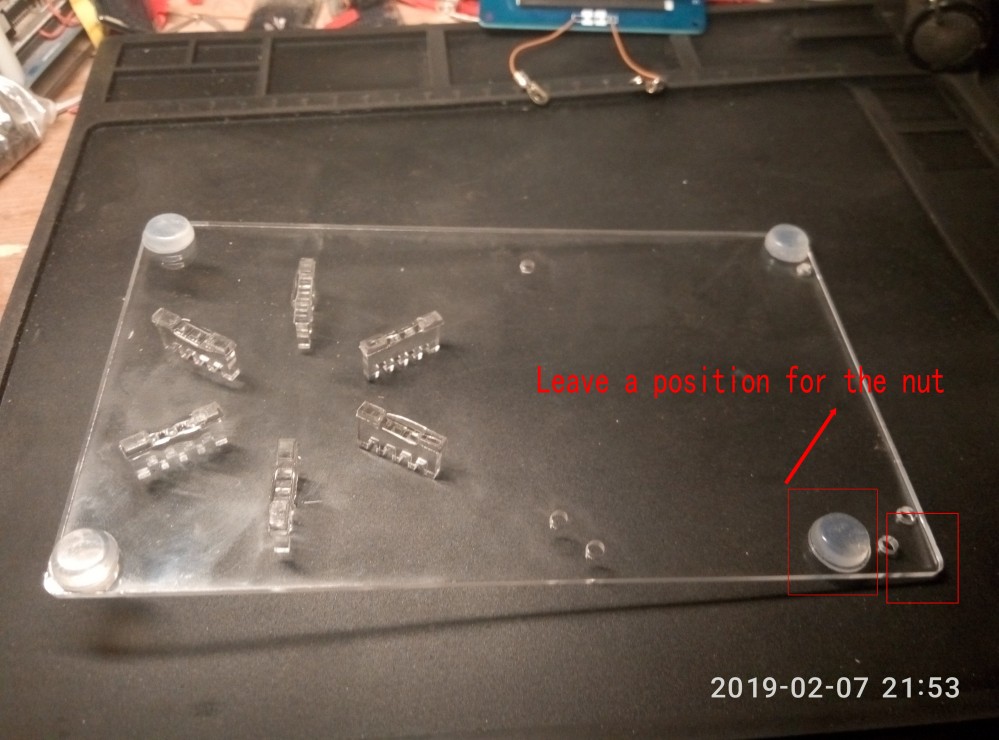
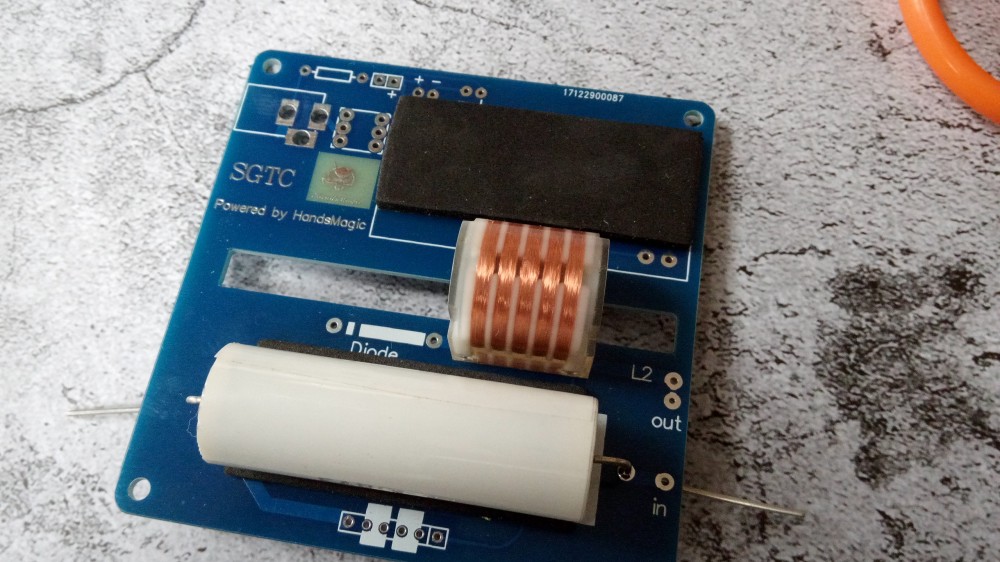
Assemble the board

The primary coil winds three turns(Although the bottom is reserved for 4 turns, but please winds only 3 turns,and must Clockwise)
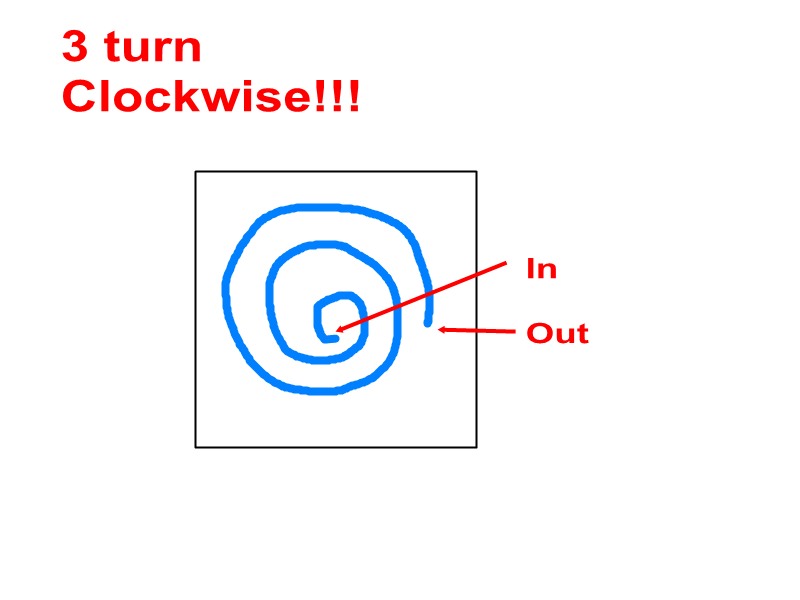
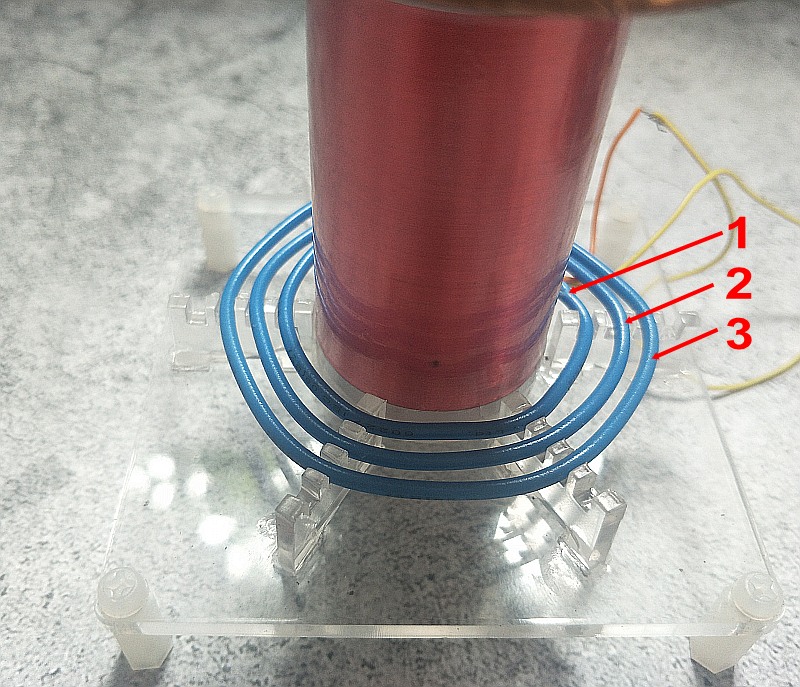
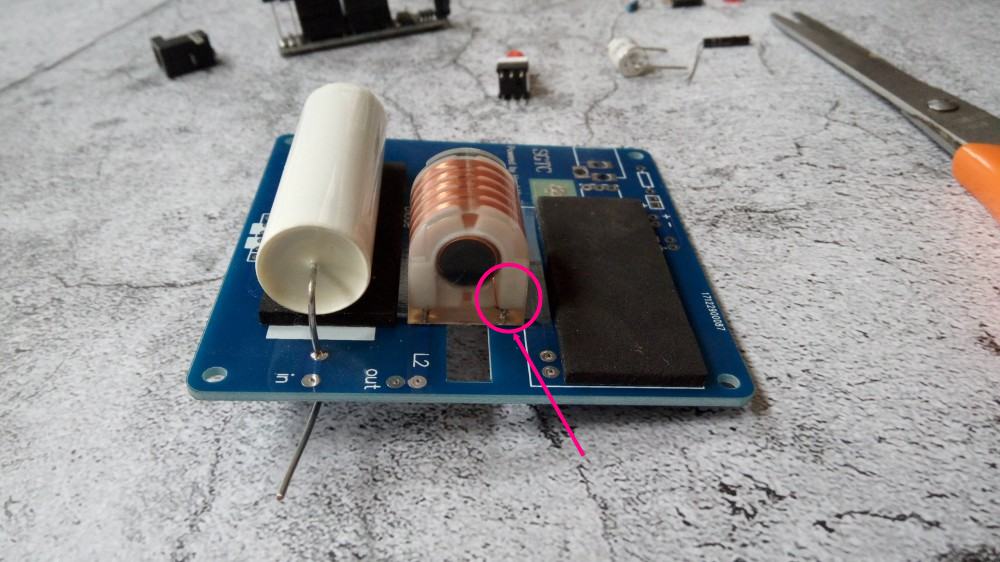
Now solder the “IN” “Out” “L2”
The soldering place is best to do insulation treatment,
Prevent discharge(Cover exposed wires with tape)
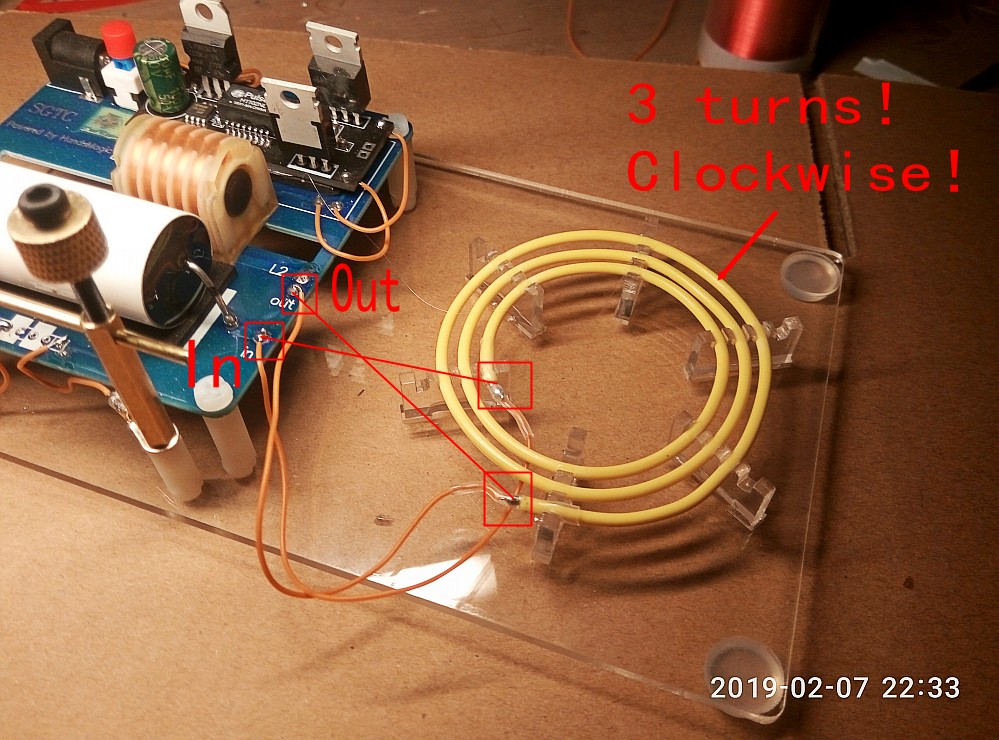
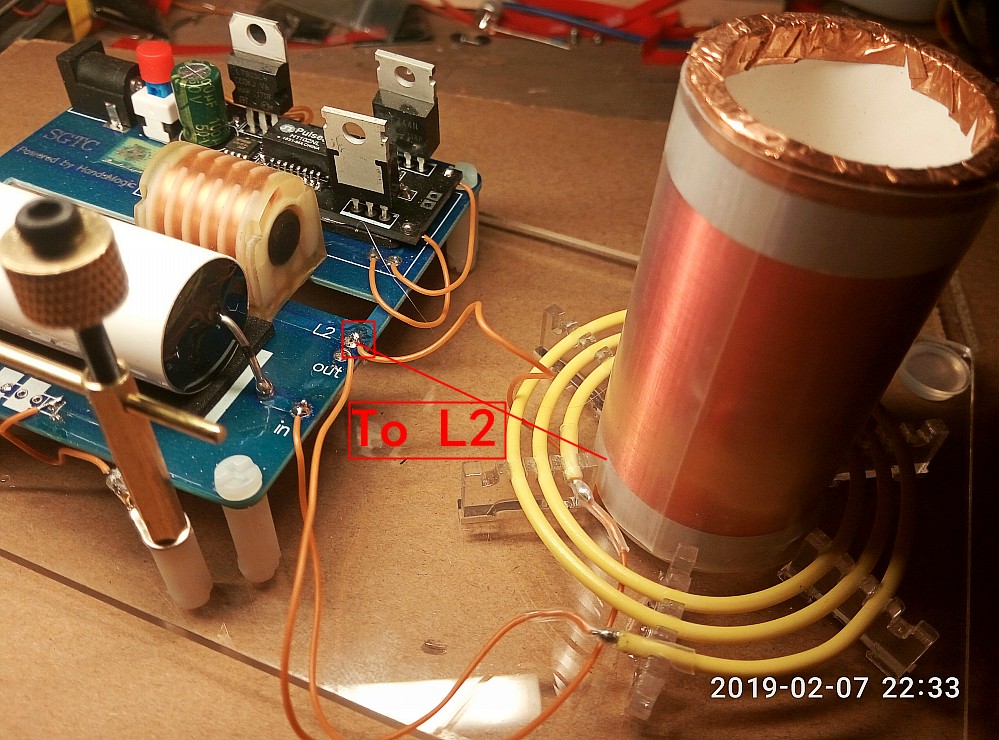
The wire of the secondary coil is soldered to “L2″
In fact,” L2″ and ” Out” is connected…………
install the Nylon nut ………..

Copper column,make sure the hole on the Copper column is like picture

the Copper ball has hole,you need solder the Copper stick on the hole….
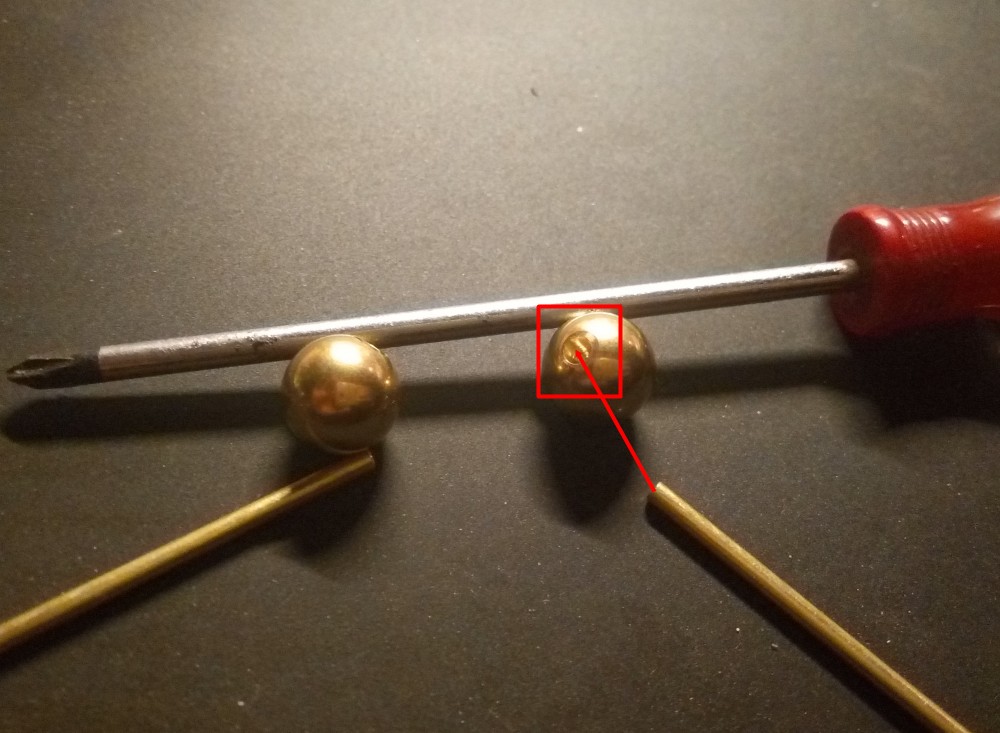


Adjust the distance of the copper ball, the interval should be less than 1mm, otherwise the voltage can not work through the air, it can not work, can be adjusted in the range of 0.1-1mm, can get different discharge effects
Determine the distance and lock with the nut………..
Ok,finished all the assemble,and about the metal top load,just put it on the Secondary coil………No need to fix
About the power suply:
you can use any DC12v power suply(make sure the out put current is 1A-2A)
For example:


if you don’t want to use the plug,you can solder two wire directly to the board,and connect them to your DC12v power
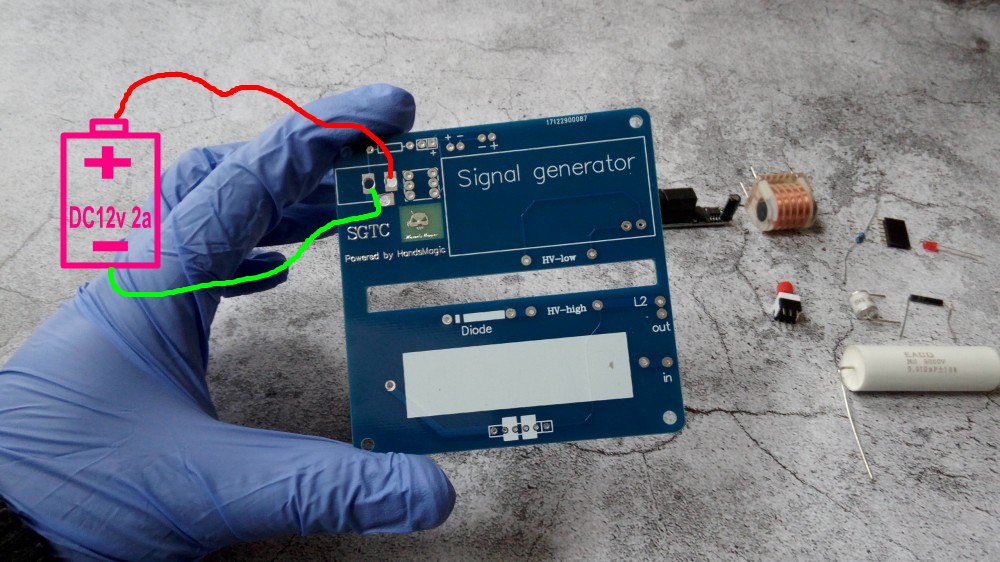
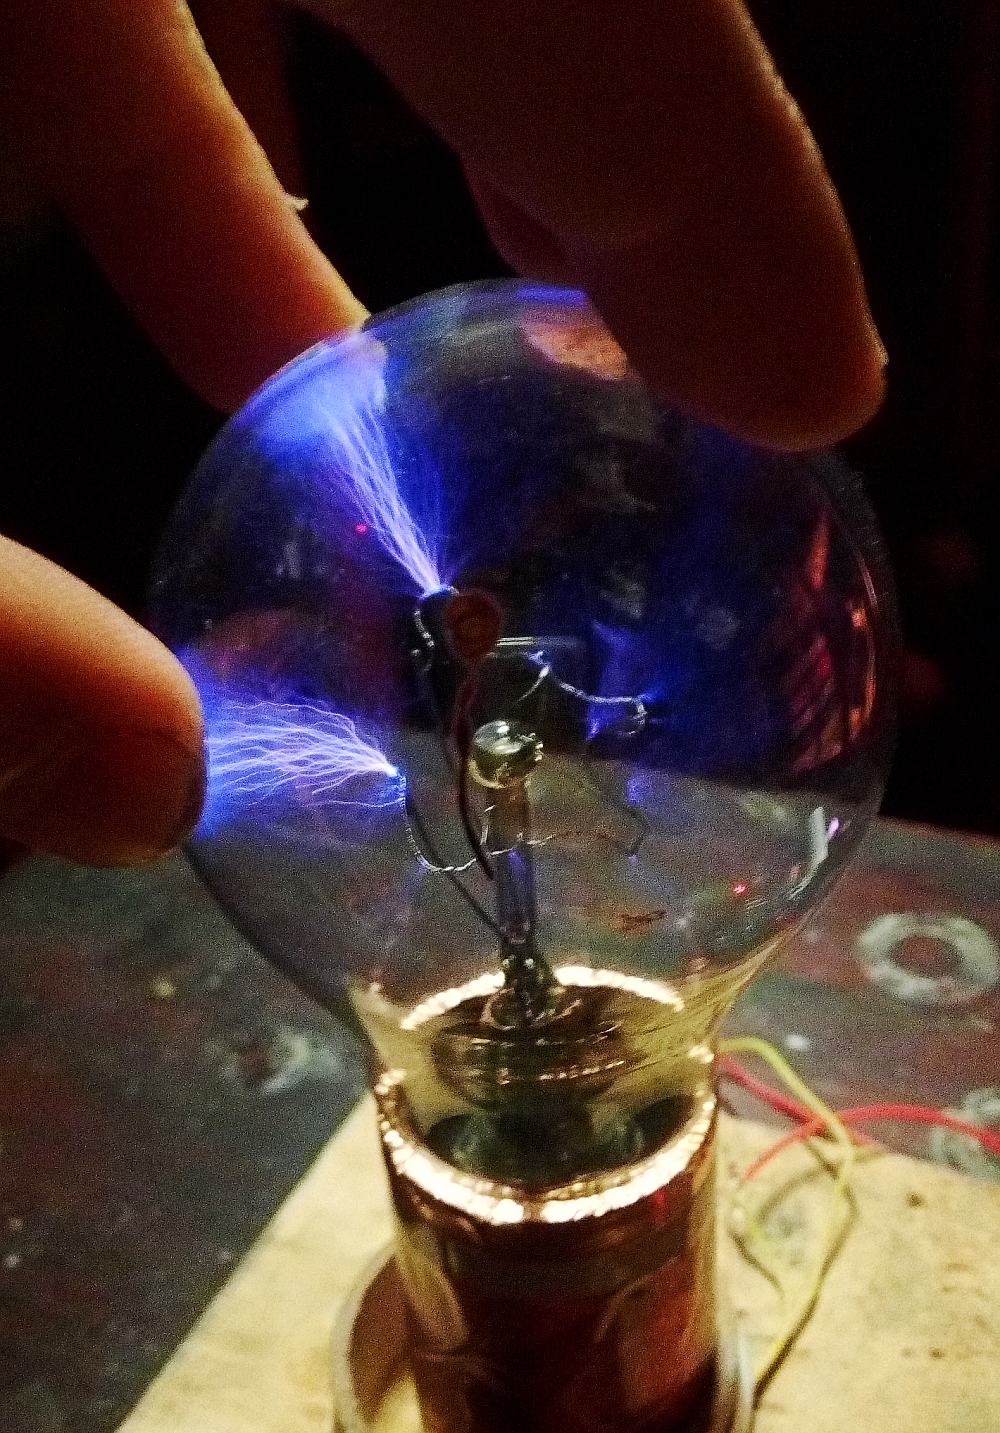
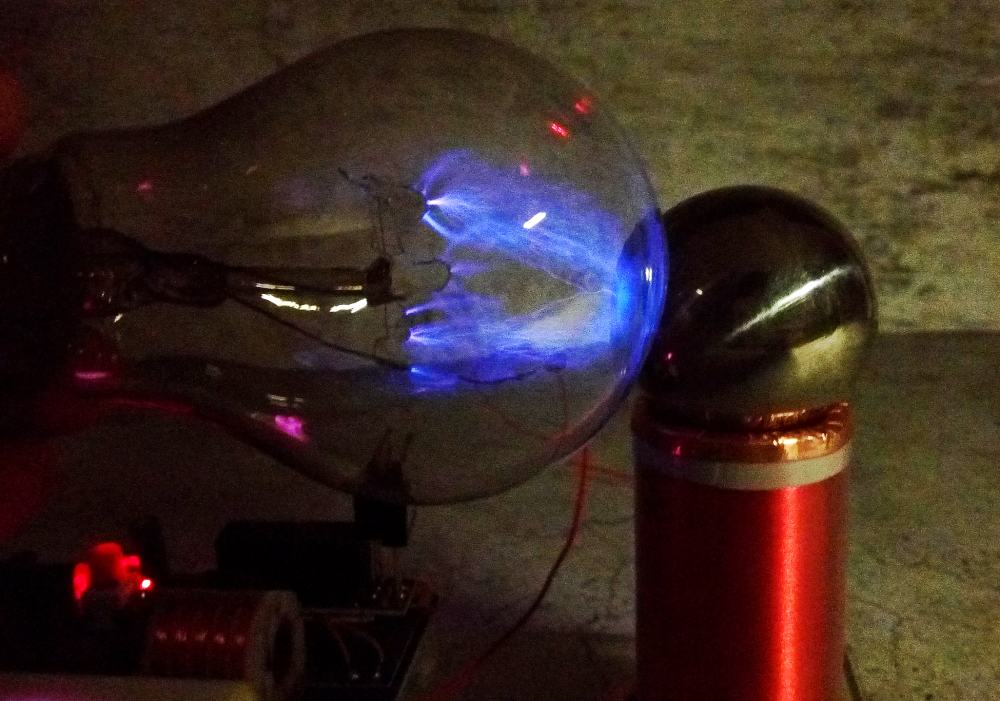
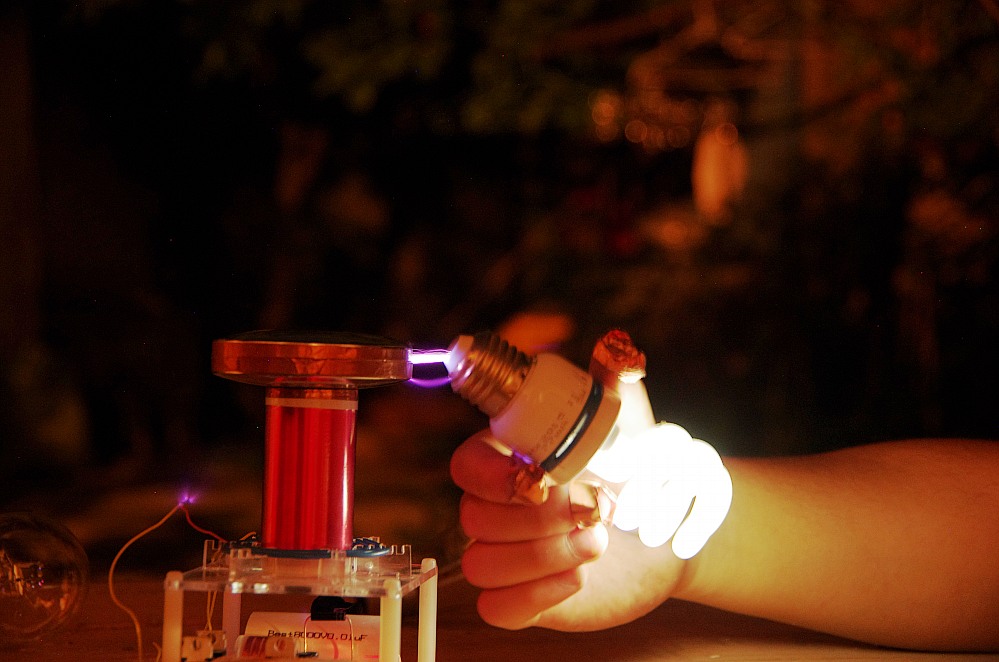
ok,all is done,12v dc power,you can use it now(plz use it in dark place,you can see the spark and arc)
find a Incandescent lamp

4 评论
Good evening, I just bought the tesla coil, I have a question: regarding the connection cable of the secondary coil (red color) where is it connected?
to L2
I cant stop the arc from the in line to the coil. I have tried every thing
you need Brush a layer of insulating paint