

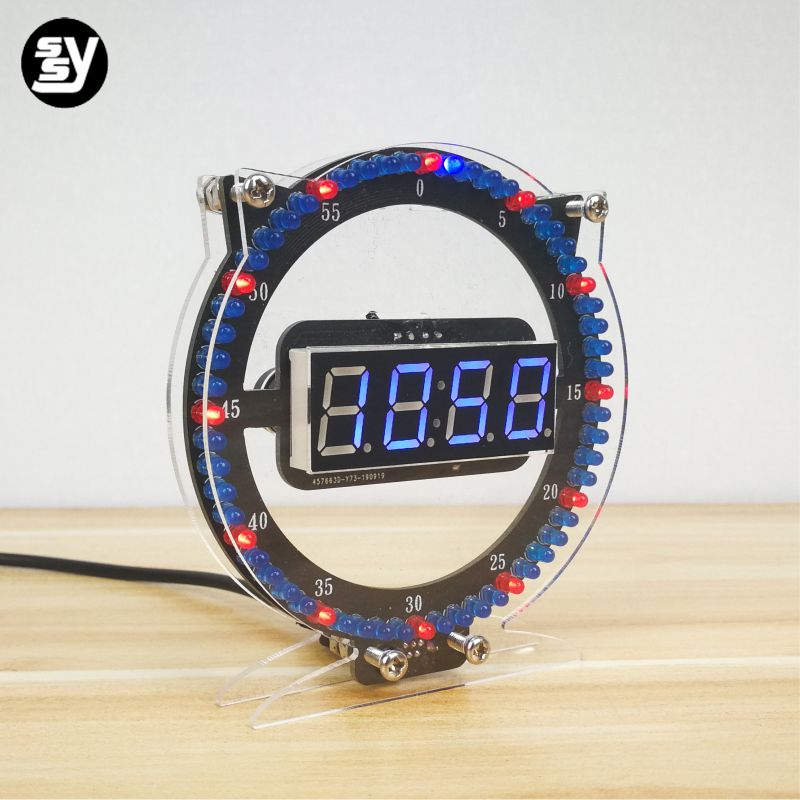
Cool Cat digital clock diy

Simple Mini Tesla Coil diy
6月 1, 2020Mini table SGTC spark gap tesla coil DIY
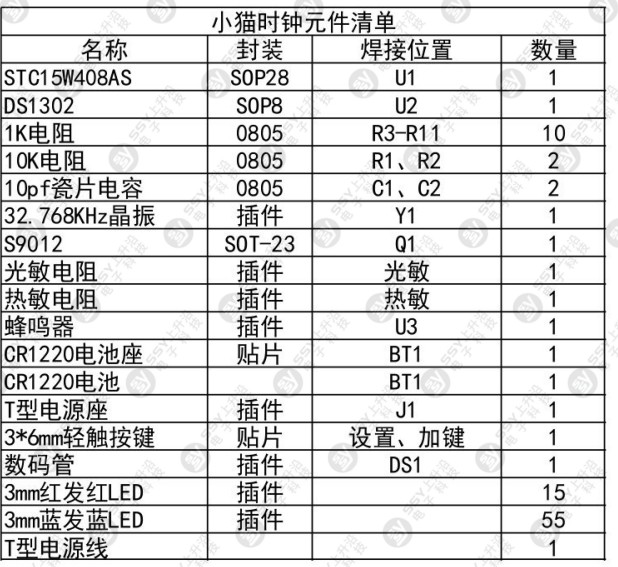
11月 1, 2020Component list
Weld the red led first, with four spaces apart, and weld one
The long leg is positive, corresponding to the symbol “+” on the circuit board
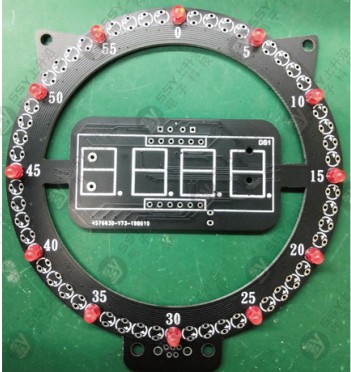
then blue led

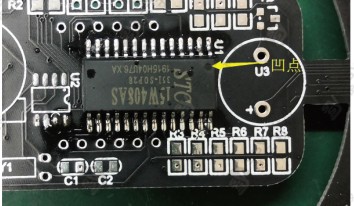
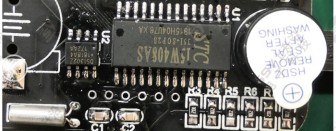
Solder the mcu, pay attention to the dots on the chip, you need to solder the chip in the correct direction
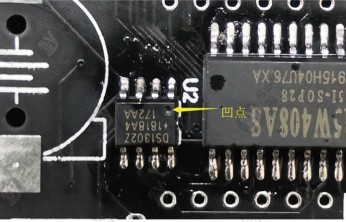
same is the timer chip
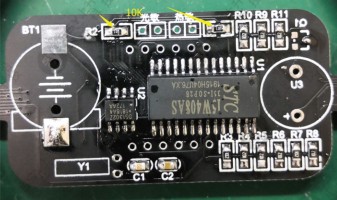
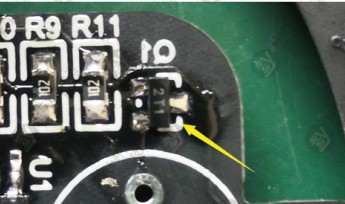
Welding resistance, r1, r2 are 10k, the rest are 1k
Welding triode
Welding crystal and buzzer
Crystal has no direction
The long leg of the buzzer is positive
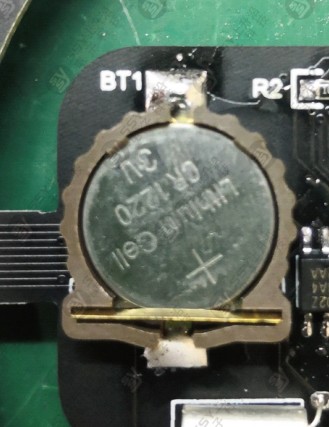
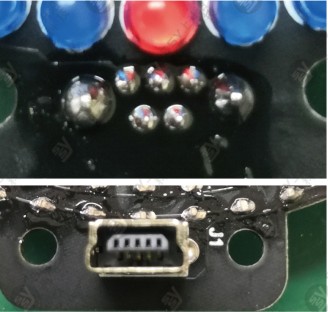
Weld the battery holder, pay attention to the direction, as shown in the figure
Weld the digital tube, pay attention to the direction, as shown in the figure

Photoresistors and thermistors
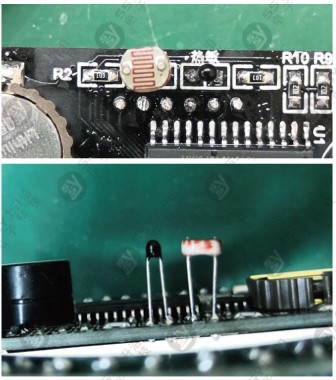
button

power socket
ok,the welding is down
next is assemble the shell,it is easy,just look at the picture
How to use?
Kitten clock usage tutorial
1. The kit uses 5V power supply
2. After soldering, check that the chip is not soldered upside down, and then power on to work. Time adjustment is required for the first power on.
1. Press the set button for the first time, it will enter the display of set minutes. At this time, every time you press the 2 button, the displayed value will increase by 1, and the value will be between O and 59. Set the corresponding value according to the current time. OK.
2. After setting the minutes, press the setting button for the second time to enter the setting. At this time, every time you press the plus button, the displayed time or increase by 1, the value is in. Between one and 23, set the corresponding value according to the current time
3. After the setting is complete, press the setting button for the third time to enter the second reset setting. At this time, the current second time will be displayed and the second will change. At this time, every time you press the plus button, the second will return to zero. If the user can set the number of seconds in the actual time as needed, when the second of the actual time becomes 00, press the plus key to set the second. (Please set the minute to be one minute more than the actual number when setting the minute, that is, the actual 50 minutes, set to 51 minutes, this is the second to zero to be accurate)
4. Press the SET button for the fourth time to enter the alarm minute setting. At this time, every time you press the No. 2 button, the displayed value will increase by 1, and the value will be between O and 59. According to the current time, set the corresponding value. can.
5. Press the set button for the fifth time to enter the alarm setting. At this time, each time you press the plus button, the displayed time or increase by 1, the value is between 0 and 23. According to the current time, set the corresponding value. can.
6. Press the setting button for the 6th time, the current digital tube will display “1-O0 ‘”, then enter the alarm clock function on or off setting, press the plus button to turn on or off (” 1 one 00″ means off, “1 One 11” means open).
7. Press the setting button for the 7th time, the current digital tube will display “2-O0 ”, then enter the light control function on or off setting, press the plus button to turn on or off (” 2-00″ means off, ” 2-11″ means open).
8. Press the setting button for the 8th time, the current digital tube will display “3一00”, and enter the temperature display function to turn on or off the setting, press the plus button to turn on or off (“3一00’ ‘means off, The normal display screen will always display the current time, “3-11” means it is on, and the normal display screen will display the clock and temperature in cycles).
9. Press the SET button for the 9th time to return to the normal display screen
10. In the normal display screen, every time you press the plus key, the Led animation effect will switch once.